Learning a new piece of software can be daunting. For top notch results you are to sit and practice for hours over a significant amount of time. If you begin your education at young age, there is a good chance that you will succeed. The later in your life you start, the more difficult it might be for you to triumph, not to mention the fact that spending this much time on something that doesn’t guarantee results might be very demotivating at first place. Knowing other digital design packages will help you to some extend, however, the vast majority of hard work is still waiting for you just around the corner, as soon as you place yourself comfortably in your computer chair.
What if there were only 17 tools needed to successfully accomplish even most demanding, automotive digital modeling projects? By understanding the philosophy behind these tools, you could effectively use them to your benefits. You could understand that 3D modeling is all about: curves, surfaces, and their manipulation, handling and final evaluation. High quality curves almost always create good surfaces. High quality geometry can then be further manipulated for better results for desired styling. During the process of digital sculpting, the evaluation tools can precisely point out possible topology problems, and indicate areas of concern to be repaired.

| 1 | Geometry Creation | Curve |
| 2 | Square | |
| 3 | Fillet | |
| 4 | Geometry Manipulation | Align |
| 5 | Transform CV/Hull | |
| 6 | Geometry Handling | Curve Projection |
| 7 | Offset | |
| 8 | Intersect | |
| 9 | Trim | |
| 10 | Untrim | |
| 11 | Detach | |
| 12 | Extend | |
| 13 | Geometry Evaluation | Zebra Stripes |
| 14 | Showroom Shade | |
| 15 | Curve Curvature | |
| 16 | Surface Continuity | |
| 17 | Cross Section Editor |
At this point I’d like to indicate that the selection of the 17 tools will suffice to complete the job. However, it won’t represent the whole power of Alias Software, but only its tiny fraction of it. The selection could very well be supplemented or replaced by many other tools not mentioned in this article. By all means, It’s certainly worth putting an effort to gradually master the entire palette.
It’s a bit like playing a guitar, if you master the main 8-10 chords and a few bar chords, and add consistent strumming, then you will be able to play pretty much majority of songs (Link to my YT video). Only by comfortably grasping the basics, will you be able to take your abilities further without major discouragements.
In the industry, your inventive skills matter most. The software is a substitute for a canvas, and tools for brushes. In automotive design the situation is particularly tricky because modelers often work as a conjunction between designers and engineers. Therefore, they are somewhat the missing link to the chain of design process. In fact, probably the most important link. Digital modeler must be an engineer and, at the same time, a designer, which means utilizing both hemispheres of his/her brain equally, or alternatively. It might seems like no big deal, but talking to engineers on “engineering matters” after a whole day of massaging and styling surfaces might pose much of a problem of sudden lateral to direct thinking exchange.
Therefore, in automotive digital design world, having a concreted set of small number of repetitive tools that are “no brainer” to utilize is the key to quick and decent results, as you only focus on design, not being distracted by complications posed by tools choice. As stated in the title of this article, tools you will ever need to successfully 3d model anything in Alias Automotive fall into 4 categories:
1. Geometry Creation
Let’s put Autodesk definition of the line tool aside, and focus on the factual, practical term.
Everything depends on this first step, as good curves might create good surfaces. If your Curve quality is bad, you can forget satisfactory geometry.
Maybe you didn’t realize that, but practically, you only need this one tool for curve creation. You can perform many actions with just this one curve. Later you can add degrees, align to other curves or surfaces, tweak CVs any way you want. You can create geometrically and aesthetically perfect looking curves just before creating the surfaces.
Square – with only one surface builder you can do just fine. Majority of surfaces will be manually manipulated anyway, so you only need to plant a seed for further development in the future.
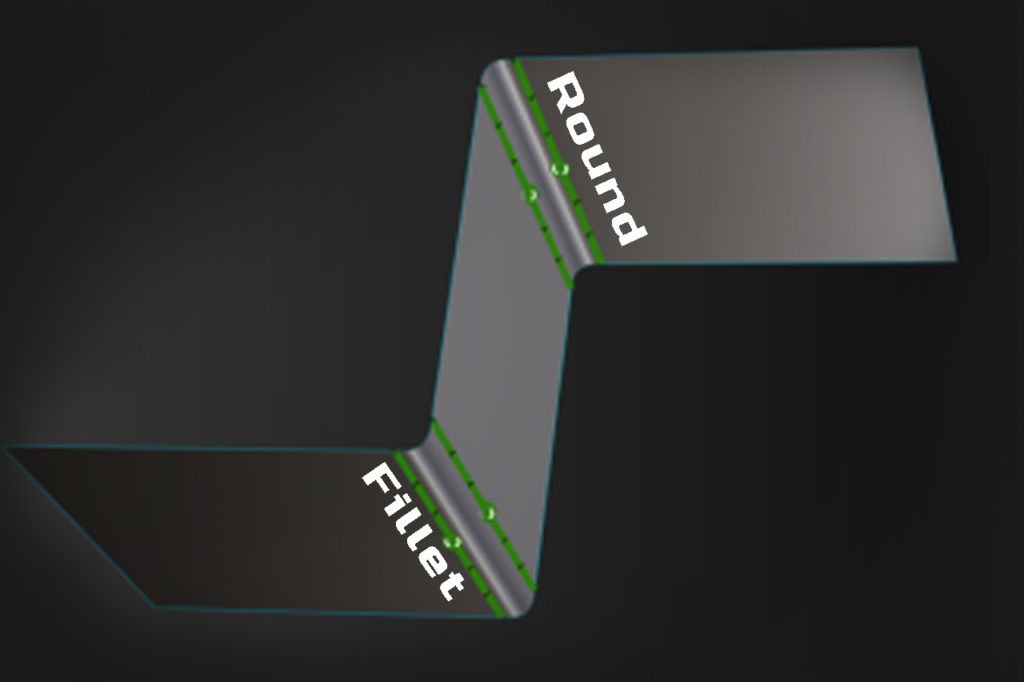
Command Fillet is used towards the end of the project. Sometimes, this operation can be skipped in CAS project stages, where speed, not quality and precision matters. The Fillet tool is used for adding or removing material, in which case, it’s usually called: round. You can think of it as creating fillets of inner edges and building rounds of outer edges principles.
2. Geometry Manipulation
In automotive modeling the ability to skilfully manipulate volumes to your liking is very important. Naturally, here you need the whole range of various aids. Still though, it’s not like these tools are greatly sophisticated but rather user-friendly. You can easily rely on them alone.
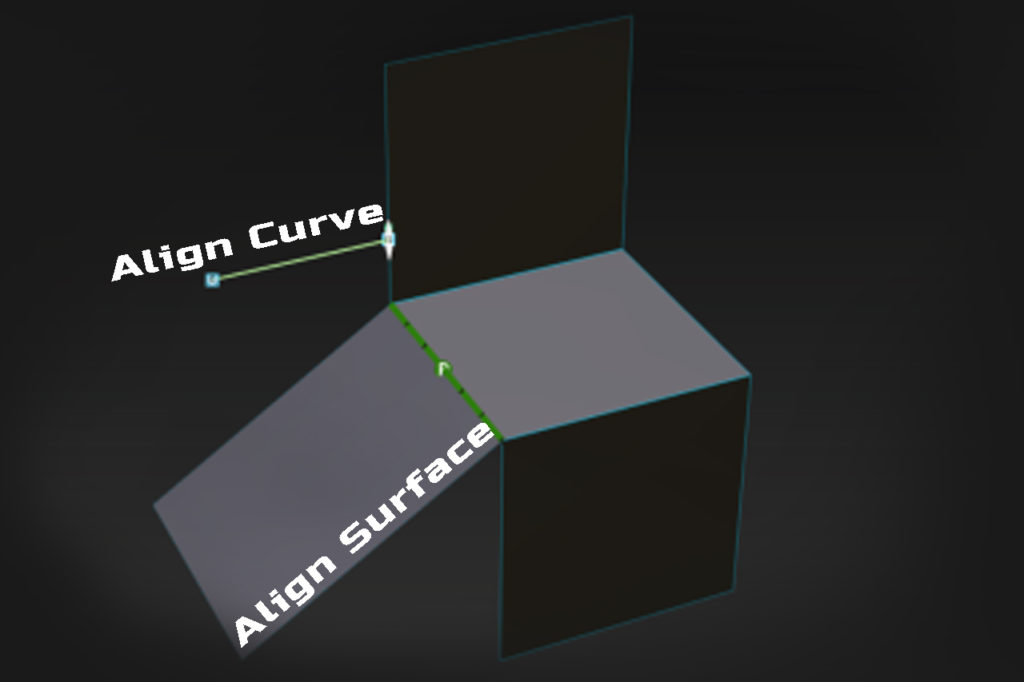
The tool palette contains the omnipresent Align. It is the ultimate “job finisher”. Align is a very powerful tool. It saves tones on time, and it’s possibly even used too often. Sometimes it is worth adjusting CVs manually rather than through the Align tool, as it might disorganize CVs. It can be used with curves as well as surfaces.
For bulk CV/hull manipulation, the Transform CV/Hull tool is an inseparable companion of everyday life. Total comprehension of this aid will give you wings in volumes and highlights manipulation. You will be performing miracles you didn’t know were possible.
3. Geometry Handling
Here we are moving to some multitask, execution tools, which Projection and Offset definitely are. The first one is perfect for creating precise Curves On Surface for further rework, like trim or align. The second one is a tool that I wanted to omit, but then I couldn’t think of any substitute for creating, let’s say, wheel arches. From time to time, you will come across a need for creating a “band” of consistent distance geometry. Transform CV/Hull might fail. The good example is below. At about 7:47 min into the film you can see the problem.
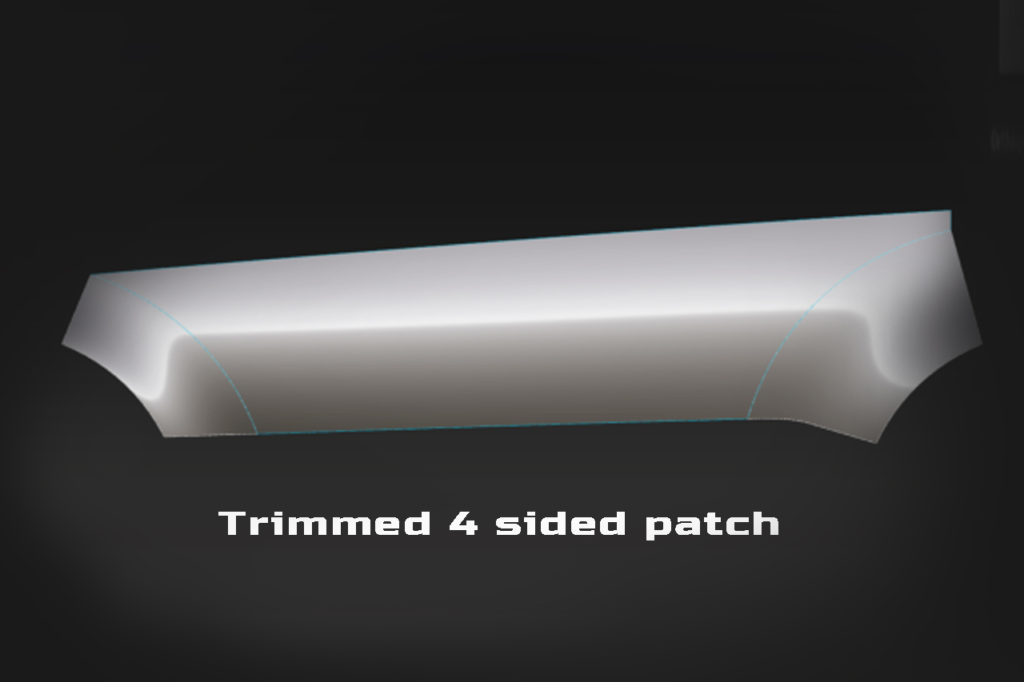
The Intersection tool is perfect for finding out where theoretical intersections between, let say, two surface patches are. Having history active (not deleted) enables you to see the behavior of topology and general nature of the surface when confronted against other geometry in progress, as you manipulate its CVs. Created with this method Curves On Surface will allow you Trim away any excess of unwanted geometry. The function of the Trim/Untrim tool is very straightforward. Modeling simply wouldn’t by possible if trimming didn’t exist or was in some way hindered and we could rely only on 4 sided patched.
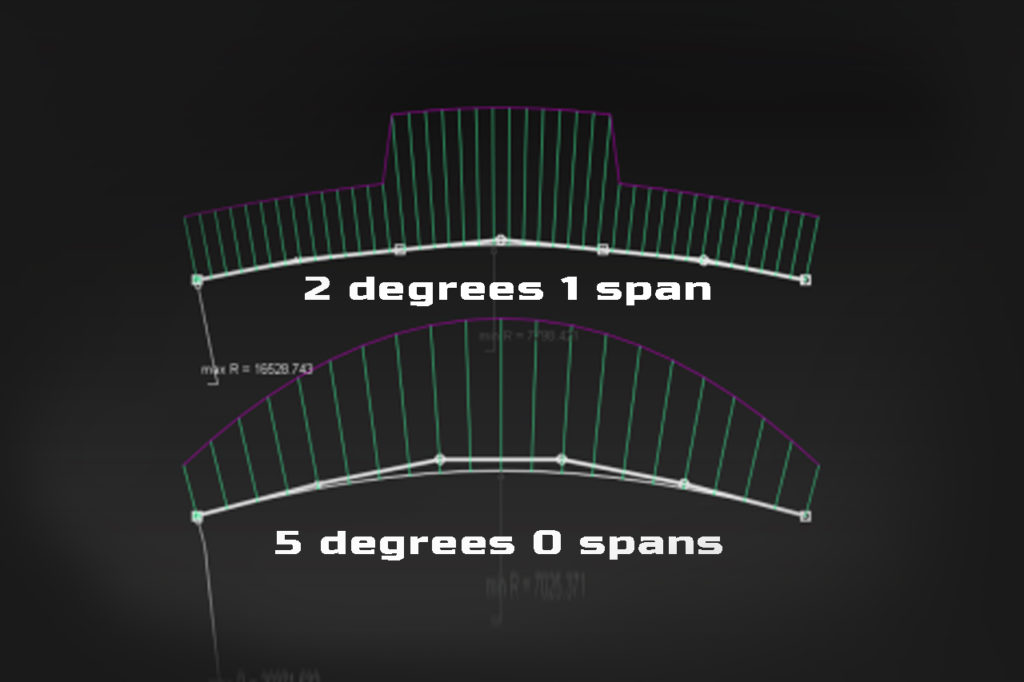
Detach option is needed to separate surfaces. If there is a span embedded in surface, using detach will simply remove it. In some occasions it is worth adding a span or spans to geometry. (see my roof video). Generally, spans work well if geometry is of 3 or more degrees. . Automotive industry, in principle, states that spans are not allowed. A great way around this requirement is adding spans for convenience, and, when the model is complete, simply perform the detach operation within “spanned” surfaces.
Attaching operation can be performed on two or more curves arrangement in the situation where we need one consistent curve instead of, let’s say, two, three or more. You can see how I attach two curves in this Y-fillet video. This method I also used when I was modeling McLaren’s 765LT front camera bulge on the front splitter.
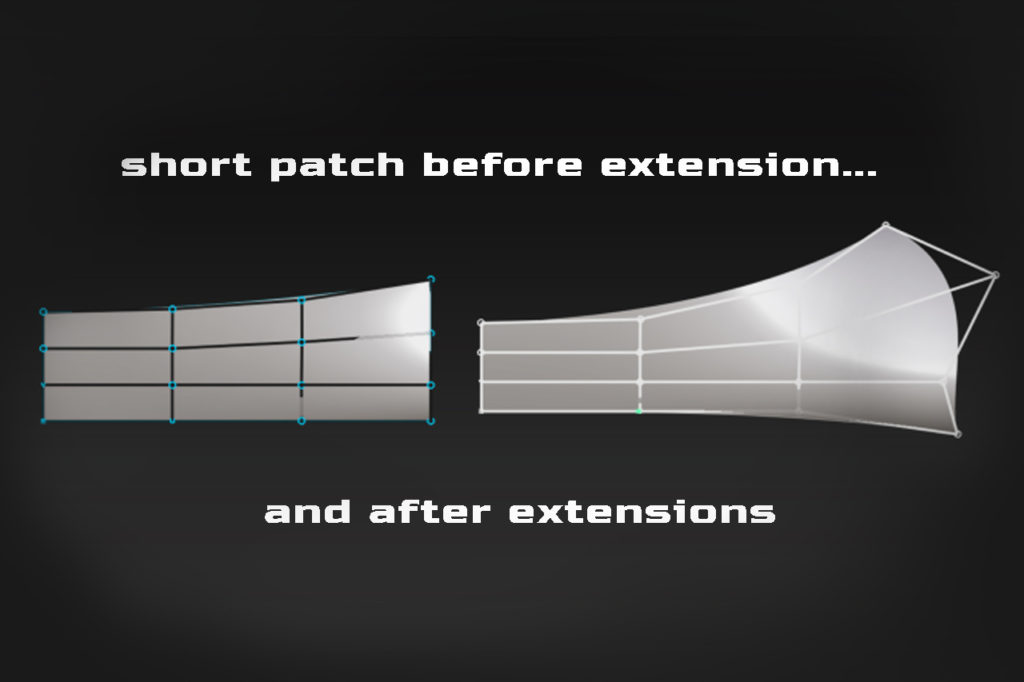
In my numerous videos (3:30min) you can see how I use Extend – shorten tool to create transitional surfaces. The principle is to you leave the “merge” option on or off according to what desired effect you are after. This way you don’t have to do filleting. Benefits? You get a perfect connection of the surfaces on one side, therefore you don’t have to consider this side. Align the other edge to the adjacent surface and, optionally, manipulate the path for better results. It’s often a good practice to create curves and surfaces longer than needed. You’d normally do it for better topology “lead-in”. As an experiment, you can try to go the other way and create something slightly too short, then try to extend it. You will see the problem!
Used on daily basis, will show you areas where rework is needed – Zebra Check, the tool in question, due to its universality and ability to show tiniest flaws, can be a nightmare of many modelers.
Zebra check doesn’t give you the real representation of models’ visual aesthetics, though. It can only help indicate some technical problems of topology. Here the Shade Showroom comes in handy. It is the most common 3 in 1 shader. It is super convenient, as it can very well represent highlights, volumes and “general feeling” of the 3D model. It’s a bit like working with a model made of mirror. If there is any flaw either in highlight of form, “the mirror” will show.
Curve curvature (9:40min) is a blessing tool. It’s mainly used on curves and around surface perimeters (edges). It’s possible to investigate Max and Min comb values. Skillful utilization of the tool will lead to perfect results, very handy for A class modeling.
Surface continuity is an inseparable companion of surface flow evaluation.
You can play with the settings in the option window of the tool for tones of additional settings. Also, by holding and dragging middle mouse button, you can decrease or increase number on check points for the undergoing evaluation. Sometimes, at first, the evaluation shows positive results, but after increasing the number of check points the result turns negative. If this happens, you need to put more effort to make surfaces better.
Cross Section Editor (16:10) An everyday tool for reverse modeling. By having the lattice of X, Y ,Z lines cutting through the scan mesh of an object, you are able to perform surface rebuild more accurate, because you have a constant insight into the distance deviation between the mesh and the model.
Becoming proficient in digital modeling is not witchcraft. If you can master the 17 tools listed above, you will realize that modeling anything you wish is much easier than initially portrayed. Just remember to take one step at a time, and don’t get discouraged or demotivated by giving yourself responsibilities that are too challenging too soon. Remember to cut a sliver of the cake that you are able and digest. Wish you all the best.
